
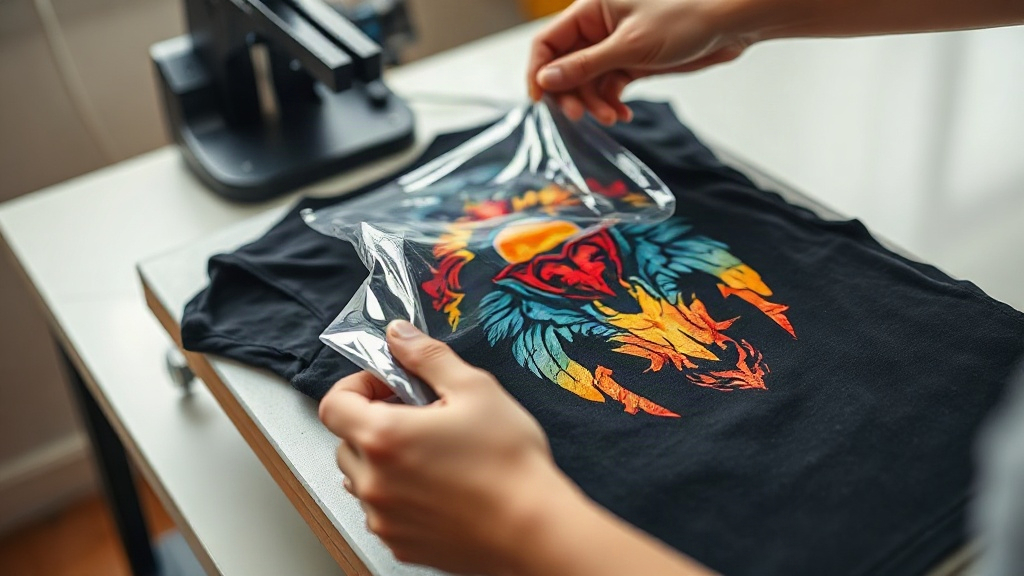
If you've been exploring custom apparel printing, you've likely encountered DTF Transfers. This technology has rapidly gained popularity for its versatility, vibrant colors, and ease of use. Whether you're a small business owner, a hobbyist, or simply curious about printing methods, understanding DTF transfers can open up a world of possibilities. In this guide, we'll walk you through everything you need to know, from the basics to advanced tips, so you can achieve professional-quality results.
What Are DTF Transfers?
DTF stands for Direct-to-Film. It's a printing method where your design is printed onto a special film, coated with a adhesive powder, and then heat-pressed onto fabric. Unlike DTG (Direct-to-Garment) or screen printing, DTF transfers can be applied to a wide range of materials, including cotton, polyester, blends, and even nylon. The process involves printing with specialized inks onto a PET film, dusting with hot-melt adhesive powder, curing the powder, and then transferring the design onto the garment using a heat press.
Why Choose DTF Transfers?
There are several compelling reasons to consider DTF Transfers for your printing needs.
- Versatility: Works on almost any fabric, including dark and light colors, without the need for pre-treatment.
- Durability: When applied correctly, DTF prints are stretchable, crack-resistant, and withstand repeated washing.
- Vibrant Colors: The inks produce bright, opaque colors, even on dark garments.
- Cost-Effective for Small Runs: No minimum order quantities, making it ideal for small businesses and personalized items.
- Detail Retention: High-resolution designs with fine details and gradients reproduce beautifully.
How DTF Transfers Work: Step by Step
Understanding the process helps you troubleshoot and achieve better results. Here's a breakdown of the DTF workflow.
1. Design Preparation
Start with a high-resolution image, ideally 300 DPI. Ensure your design is mirrored (flipped horizontally) before printing, as the film will be placed face-down on the fabric. If your design has a white underbase, it's automatically included in the print.
2. Printing
Using a DTF printer, the design is printed onto a PET film. The printer lays down white ink first (as a base), followed by CMYK inks. This layering ensures opacity on dark fabrics.
3. Powder Application
While the ink is still wet, a hot-melt adhesive powder is applied evenly over the print. The excess powder is shaken off, leaving a thin layer adhering to the ink.
4. Curing
The film with powder is then cured using a heat source, typically a heat press or a curing oven. This melts the powder, creating a dry, tacky surface that will bond to the fabric.
5. Transferring
Once cured, the transfer is ready to apply. Set your heat press to the recommended temperature (usually 300-325°F) and pressure (medium to firm). Place the transfer face-down on the garment, press for 10-15 seconds, then peel the film off while it's still warm (warm peel) or after it cools (cold peel), depending on the film type.
Key Factors for Successful DTF Transfers
To get professional results, pay attention to these critical factors.
Temperature and Pressure
Each film and powder combination may have specific recommendations. Generally, 300-325°F with medium pressure works well. Too little heat and the powder won't fully melt; too much can cause the film to distort or the ink to spread.
Time
Press time typically ranges from 10 to 15 seconds. Again, follow the manufacturer's guidelines. Over-pressing can lead to a dull finish or loss of detail.
Peel Method
Warm peel is common for DTF transfers, but some films require cold peel. Test a small piece first to determine the best method for your supplies.
Fabric Type
While DTF works on many fabrics, some like nylon or waterproof materials may require special low-temperature films or additional steps. Always test on a scrap piece.
Common Mistakes to Avoid
Even experienced printers make mistakes. Here are some pitfalls to watch out for.
- Insufficient powder: Leads to poor adhesion and early peeling.
- Uneven pressure: Causes patchy transfers.
- Wrong peel time: Can result in cracked or incomplete transfers.
- Skipping pre-press: Always pre-press the garment to remove moisture and wrinkles.
- Not testing: Always do a test press on a similar fabric before production runs.
DTF Transfers vs. Other Printing Methods
How does DTF stack up against DTG, screen printing, and vinyl?
- DTG: Best for 100% cotton, requires pre-treatment, less durable on synthetics.
- Screen Printing: Cost-effective for large orders, but setup costs are high and not ideal for complex designs.
- Vinyl: Limited to simple designs, not suitable for multi-color or photographic images.
- DTF: Excels in versatility, detail, and small batches, with no minimums.
Applications of DTF Transfers
DTF transfers are used for a variety of items beyond t-shirts. You can apply them to hoodies, tote bags, caps, denim jackets, and even canvas shoes. The possibilities are endless, limited only by your creativity.
Tips for Long-Lasting DTF Prints
To ensure your DTF prints withstand the test of time, follow these care instructions:
- Wait 24 hours before washing.
- Turn the garment inside out.
- Machine wash cold, gentle cycle.
- Do not bleach or use fabric softener.
- Tumble dry low or hang dry.
- Iron inside out, avoiding the print directly.
Frequently Asked Questions
Can DTF transfers be applied to 100% polyester?
Yes, DTF transfers work well on polyester and polyester blends. However, because polyester is heat-sensitive, use a lower temperature (around 280-300°F) to prevent scorching or dye migration. Always test first.
How do I remove a DTF transfer if I make a mistake?
If you need to remove a DTF transfer, you can re-press the garment with a heat press at a higher temperature (around 350°F) for a few seconds, then peel it off while hot. Alternatively, use a heat gun to soften the adhesive and scrape it off carefully.
What is the shelf life of DTF transfers?
When stored properly in a cool, dry place away from direct sunlight, DTF transfers can last up to 6 months to a year. Keep them in a sealed bag to prevent dust and moisture.
Do I need a special printer for DTF transfers?
Yes, you need a DTF printer that uses DTF inks and a film. These printers are specifically designed to handle the white ink and powder application. However, you can also purchase pre-made DTF transfers from suppliers if you don't want to invest in a printer.
How durable are DTF transfers compared to screen printing?
When applied correctly, DTF transfers are highly durable and can withstand many washes. They are stretchable and resistant to cracking. Screen printing may last longer on high-wear items, but DTF is comparable for most applications.
With this guide, you're well-equipped to start your DTF journey. Remember, practice makes perfect, so don't be afraid to experiment and refine your technique. For high-quality DTF supplies and transfers, visit DTF Prods at dtfprods.com.