
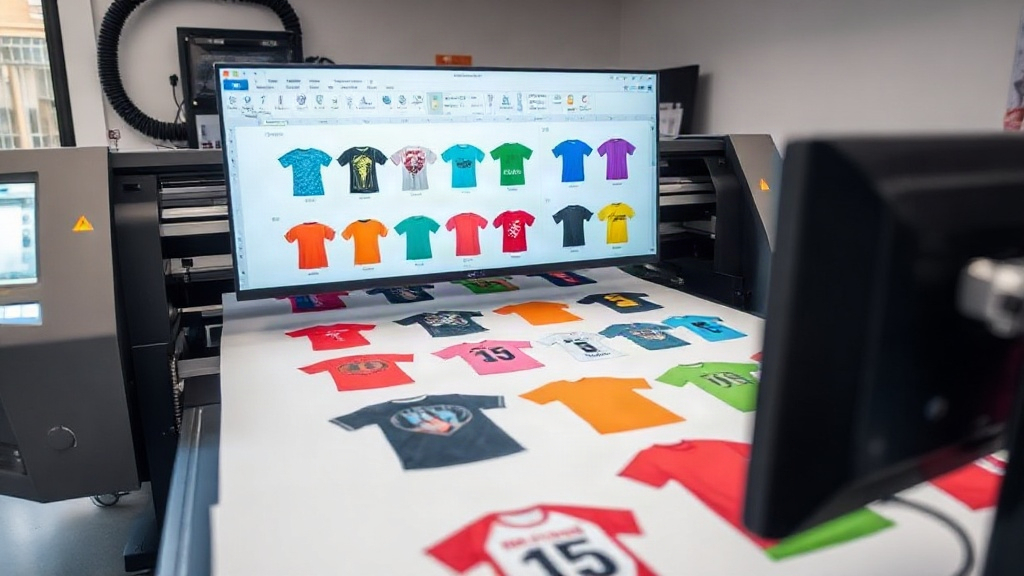
If you're in the custom apparel business, you've probably heard about DTF printing. It's a game-changer for producing vibrant, durable transfers on a wide range of fabrics. But as your orders grow, manually arranging transfers on a sheet becomes a bottleneck. That's where a DTF gangsheet builder comes in. This tool lets you combine multiple designs into one large sheet, maximizing your printer's output and minimizing waste. In this guide, we'll walk you through everything you need to know about gang sheets, from the basics to advanced strategies that can take your shop to the next level.
What Is a DTF Gangsheet?
A gang sheet is a single large sheet of DTF film that contains multiple designs printed together. Instead of printing each transfer individually, you arrange them tightly to use every inch of film. This approach saves time, reduces material costs, and increases your production capacity. Think of it as carpooling for your prints: more designs share the same ride, so you get more done with less.
Gang sheets are especially valuable for DTF printing because the process involves printing on a special film, powdering with adhesive, and curing. By batching designs, you run the printer and shaker less often, which extends equipment life and cuts labor time.
Why Use a DTF Gangsheet Builder?
You might be wondering, "Can't I just arrange designs manually in my design software?" You could, but a dedicated DTF gangsheet builder makes the process faster and less error-prone. Here's what you gain:
- Automated nesting: The software automatically rotates and positions designs to fill gaps, maximizing film usage. This is like playing Tetris, but the computer does it for you.
- Precise spacing: It applies consistent gaps between designs, so cutting and pressing are easier. No more overlapping or misaligned transfers.
- Size optimization: You can input your film width and length, and the builder fits as many designs as possible. This reduces leftover film and saves money.
- Time savings: What used to take an hour manually now takes minutes. You can focus on other parts of your business.
Plus, many builders integrate with popular design tools and even allow you to upload multiple files at once. If you're still arranging by hand, you're leaving money on the table.
How to Choose the Right DTF Gangsheet Builder
Not all gangsheet builders are created equal. Some are standalone software, while others are web-based. Here are key factors to consider:
Compatibility
Does it work with your operating system? Does it support the file formats you use (PNG, PDF, AI, etc.)? If you work with vector files, ensure the builder preserves transparency and resolution.
Ease of Use
Look for an intuitive interface. If the learning curve is steep, you'll waste time training. Many modern builders have drag-and-drop functionality and real-time previews.
Features
Advanced features like auto-nesting, rotation, and custom spacing are must-haves. Some builders also offer cost estimation, which helps you price your products accurately.
Price
Some builders are free, while others require a subscription. Consider your volume: if you print dozens of gang sheets weekly, a paid tool with robust features pays for itself quickly.
At DTF Prods, we've developed our own gangsheet builder that addresses these points. It's web-based, user-friendly, and packed with features to streamline your workflow. But regardless of which tool you choose, make sure it fits your specific needs.
Step-by-Step: Creating a Gang Sheet with a Builder
Let's walk through the typical process of using a DTF gangsheet builder. The exact steps may vary, but the general flow is similar.
- Upload your designs: Start by importing your artwork. Most builders allow multiple files at once. Ensure your designs are high-resolution (300 DPI recommended) and have transparent backgrounds.
- Set your sheet dimensions: Enter the width and length of your film. Common widths are 13", 17", and 22", but you can customize. The builder will use this to constrain the layout.
- Arrange and nest: The builder will automatically place designs, but you can also manually adjust. Use auto-nesting to optimize space. You can rotate designs, group them, or lock them in place.
- Add spacing: Set a gap between designs (usually 0.1" to 0.2"). This makes cutting easier and prevents adhesive from bleeding.
- Review and export: Preview the layout to ensure no overlaps and that all designs are included. Then export as a high-resolution file (PDF or PNG) ready for printing.
Once exported, you can print the gang sheet on your DTF printer, apply powder, cure, and you're ready to press. The time saved in layout translates directly to more orders fulfilled.
Tips for Maximizing Your Gang Sheets
Even with a builder, there are best practices to get the most out of your gang sheets. Here are some tips from our experience:
- Group by size: If you have many small designs, group them together to fill gaps. Large designs can be placed on separate sheets to avoid wasting film.
- Use a consistent gap: A uniform gap makes cutting with a trimmer or cutter easier. We recommend 0.1" for most designs.
- Consider the grain: DTF film has a grain direction? Actually, it doesn't, but some printers have a preferred feed direction. Align designs accordingly for best print quality.
- Test your layout: Before printing a full sheet, do a small test with a few designs to ensure everything fits and prints correctly.
- Keep a library: Save your gang sheet layouts for repeat orders. If a customer orders the same set again, you can reuse the file.
Another pro tip: use the builder's cost calculator to determine your material cost per transfer. This helps you set profitable prices.
Common Mistakes to Avoid
We've seen many shops struggle with gang sheets. Here are pitfalls to steer clear of:
- Overcrowding: Trying to squeeze too many designs can lead to cutting errors and poor print quality. Leave a little breathing room.
- Ignoring resolution: Low-res images will look pixelated when printed. Always use high-quality artwork.
- Forgetting about margins: Most printers can't print edge-to-edge. Leave a small margin (0.25") around the sheet to avoid cut-off.
- Not updating software: Builders improve over time. Regular updates bring new features and bug fixes.
By avoiding these mistakes, you'll save time and materials.
Frequently Asked Questions
What is the ideal size for a DTF gang sheet?
The ideal size depends on your printer's maximum width and the designs you're printing. Common widths are 13", 17", and 22". For length, you can go as long as your film roll allows, but keep it manageable for cutting. A typical gang sheet might be 22" x 36" or 22" x 60".
Can I use a gangsheet builder for other printing methods?
Yes, the concept of gang sheets applies to screen printing, DTG, and sublimation. However, the spacing and nesting may differ. A DTF gangsheet builder is specifically optimized for DTF film and adhesive powder application.
How do I calculate the cost per transfer on a gang sheet?
Add up the cost of film, ink, powder, and labor, then divide by the number of transfers on the sheet. Most builders include a cost estimator, or you can use a spreadsheet. Remember to factor in waste from misprints.
Do I need special software to create gang sheets?
While you can manually arrange designs in graphic software like Photoshop or Illustrator, a dedicated builder automates the process and reduces errors. It's worth the investment if you produce gang sheets regularly.
How often should I update my gangsheet builder?
Check for updates monthly. Developers often release improvements that enhance nesting algorithms or add new features. Staying current ensures you're getting the best performance.
With the right DTF gangsheet builder, you can transform your production line. It's not just about saving a few minutes; it's about scaling your business efficiently. Start experimenting with layouts, and you'll quickly see the benefits in your bottom line.