
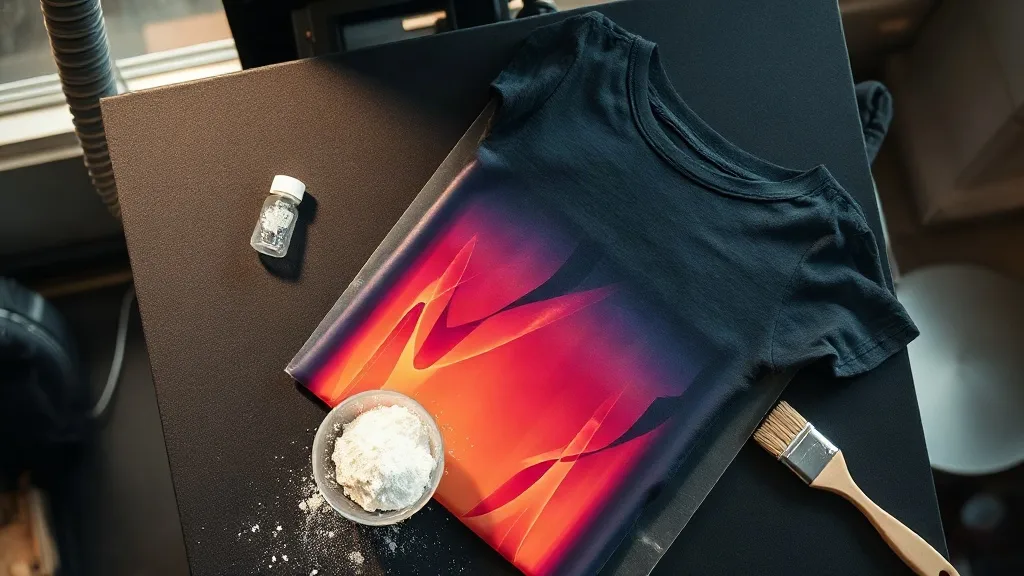
Most people meet dtf transfers for the first time in a small print shop, watching a sheet of cloudy film go under a heat press and come out as a full-color graphic on a cotton t-shirt. It looks almost too simple. In reality, the process behind that sheet involves a specific ink chemistry, a thermoplastic powder, and a set of press settings that reward patience. This guide walks through what dtf transfers are, where they outperform older decoration methods, and how to avoid the mistakes that make prints crack, fade, or peel after a few washes.
What a DTF Transfer Actually Is
DTF stands for direct to film. A printer lays down water-based pigment inks onto a special PET film, mirroring the artwork so it reads correctly once flipped onto fabric. While the ink is still wet, a hot-melt adhesive powder is applied across the printed area. The powder sticks only to the ink, gets shaken off the unprinted film, and is then melted into the design with gentle heat. The result is a flexible, stretchable transfer with a thin adhesive layer on the back.
That adhesive layer is the whole point. Because the powder bonds to textiles under heat and pressure, the transfer does not care whether your garment is 100% cotton, a poly-cotton blend, or a tri-blend. Screen printing needs different inks for different fabrics. Vinyl cutting struggles with fine detail and gradients. A dtf transfer handles a photographic image with soft shadows on a dark heather shirt and on a white canvas tote with the same workflow.
Film, Ink, and Powder in Plain Terms
- Film: a coated PET sheet that releases cleanly after pressing. Matte and glossy variants exist; matte film is easier to handle and less prone to static.
- Ink: pigment-based, with a white ink layer printed underneath color so designs stay opaque on dark garments.
- Powder: a fine hot-melt adhesive, usually TPU-based, applied while the ink is tacky and cured until it looks slightly glossy.
Once cured, the sheet is stable. You can stack it, ship it, and store it for months if you keep moisture away from it. That shelf stability is why transfers have become a favorite for small shops that want to offer full-color apparel without buying a printer.
Where DTF Transfers Beat Other Methods
Every decoration method has a niche. Heat transfer vinyl is fast and cheap for single-color names and numbers, but layering three or four colors adds weight and stiffness. Screen printing wins on long runs of the same design, yet setup costs make a five-piece order expensive. DTF sits in the middle: no minimums, no color limits, and no per-color setup charge.
The practical advantage shows up in three situations. First, small batches with many variations, such as team jerseys where each shirt carries a different name and number. Second, designs with photographic detail, fine gradients, or thin linework that would be tedious to weed in vinyl. Third, mixed-fabric orders, where one job might include cotton tees, polyester hoodies, and canvas totes. In all three, the same transfer works with only minor press adjustments.
What It Does Not Do Well
Honesty matters here. A DTF print sits on top of the fabric rather than soaking into it, so it has a slight hand feel, similar to a thin vinyl but softer. On very stretchy performance fabrics with high elastane content, the print can stretch beyond its tolerance and develop hairline cracks unless you use a low-temperature, high-pressure press and a stretch-friendly powder. Very textured fabrics, like heavy waffle knits or coarse burlap, prevent full contact and leave patchy adhesion. And on nylon or coated water-resistant shells, adhesion is unreliable without a specialty bonding layer.
Pressing a DTF Transfer Correctly
Most failures blamed on the transfer are actually press problems. The three variables that matter are temperature, pressure, and time, and they interact. A common working range is 150 to 160 degrees Celsius for 10 to 15 seconds, with medium to firm pressure, but the garment and film supplier should always set the final numbers.
- Pre-press the garment for a few seconds to drive out moisture. Cotton holds humidity, and trapped steam blocks adhesion.
- Place the transfer with the printed side down and the film backing facing up. Confirm the artwork is oriented correctly before you commit.
- Press with even pressure across the whole design. Small designs can sit under the edge of a larger platen and receive less force than the center.
- Peel warm, not hot. Let the sheet cool for a few seconds until it is comfortable to touch. Peeling too hot can stretch the ink.
- Post-press for a few seconds with a cover sheet to lock the adhesive into the fibers.
Two details get overlooked. First, a Teflon or silicone cover sheet protects the print from a dirty upper platen; a speck of cured ink transferred from a previous job will leave a permanent mark. Second, pressure calibration matters more than the number on the dial. A press that reads 160 degrees but delivers light pressure will produce a print that looks fine and fails in the wash.
Wash Testing Before You Ship
Before committing to a full order, press one sample and run it through five wash cycles inside out, with a normal detergent, and tumble dry low. Check the edges of the design, which is where lifting starts. If the border holds after five cycles, it will usually hold for the life of the garment. This single test saves more customer complaints than any other quality step.
Buying Transfers: What to Look For
If you are searching for dtf transfers near me, you are probably weighing local pickup against shipping. Local pickup has real value when you need a job today and want to inspect the sheet before you pay. Shipping makes more sense for repeat orders where you already trust the print quality and want a lower unit cost. Either way, ask three questions before ordering.
- What film and powder do you use? A supplier who can name the film type and describe the powder cure is usually running a controlled process.
- Can I see a sample on my fabric? A good shop will press a test piece on the exact garment you plan to use.
- How do you handle white ink density? On dark shirts, thin white ink looks gray and washed out. Ask for a sample on black.
File preparation also affects your result. Supply artwork at 300 DPI at final print size, with transparent backgrounds rather than white boxes, and keep fine text above roughly 6 points so it stays legible after pressing. If your design has a lot of negative space, expect the shop to trim or gang multiple designs onto one sheet to reduce waste, which usually lowers your price.
Storing and Handling Transfers
Transfers are not fragile, but they are not indestructible either. Keep them flat or loosely rolled, printed side protected, in a cool dry place. Humidity is the main enemy: powder can absorb moisture and lose tack, which shows up as edges that lift after pressing. If you live in a humid climate, store sheets in a sealed bag with a silica packet. Avoid stacking heavy objects on top of loose sheets, since pressure marks on the powder layer can transfer to the print.
For shops running production, label sheets by job and date. A transfer from six months ago still works, but you want to know which batch produced a problem if one appears. A simple marker note on the backing saves a lot of guesswork later.
Frequently Asked Questions
Can DTF transfers be applied to 100% polyester?
Yes, and polyester is one of the easier fabrics to press because it tolerates heat well. Use a slightly lower temperature and watch for dye migration on dark, low-quality polyester, which can bleed into the white ink layer over time. A poly-friendly transfer or a lower press temperature reduces that risk.
How long do DTF prints last in the wash?
With correct pressing and normal care, most prints last as long as the garment. Wash inside out in cold or warm water, avoid fabric softener on the printed area, and tumble dry low or hang dry. Heat and abrasion are what wear prints down, not water alone.
Do I need a special press for DTF transfers?
A standard clamshell or swing-away heat press works. What you need is accurate temperature and consistent pressure, which many budget presses lack out of the box. An infrared thermometer and a pressure check with a simple test strip will tell you more about your press than the dial does.
Can I layer a DTF transfer over a seam or zipper?
It is possible but risky. Seams create uneven height, so pressure is uneven and adhesion suffers at the seam line. If a design must cross a seam, press it in two stages with a firm pad underneath, and test the result before producing a full run.
Is DTF cheaper than screen printing?
For small orders, almost always. Screen printing carries setup costs per color, so a 12-piece order with four colors often costs more than the same job in transfers. At several hundred pieces of a single design, screen printing usually wins on unit price. The crossover point depends on your local pricing, so quote both.